What are Drum Drips?
Drum drips are drains on dry sprinkler systems, which are used to empty the dry sprinkler pipe of any water that has collected due to condensation or water draining within the system. Since dry pipe systems are utilized in areas where water may freeze, it is important to regularly remove any condensed water to prevent freezing and damage to the pipes.
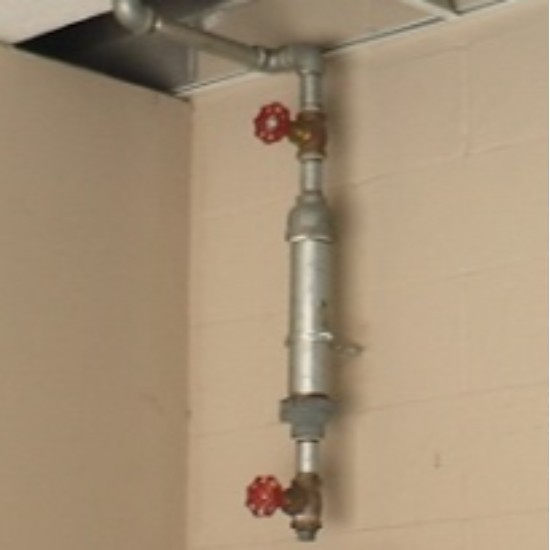
Drum drips can also be called auxiliary drains, drip legs, and condensate drains. No matter what they are called, a drum drip consists of two, 1-inch valves with a short section of two-inch pipe between them. These are normally located at the lower points of the system or where piping elevation changes may occur.
Locating and Labeling Drum Drips
Systems may have multiple drum drips and it is important that each be drained on a regular basis to prevent costly damage from freezing water. NFPA standards require that drum drips within buildings be identified so that they are easier to maintain. You must also have an informational sign at the system’s control riser that includes the location of all drum drips.
When to Perform Drum Drip Maintenance
All drum drips should be operated weekly during the fall and winter months, even if no water is found on a regular basis. When preparing for cold weather, you should operate the drum drips daily and may decrease the operation based on the amount of water discharged.
After a dry sprinkler system operation, you should perform drum drip maintenance on a daily basis until several days pass with no discharge of water from the drain valve. At that time, you can decrease the frequency to weekly or longer intervals depending on the volume of water discharged.
In many cases, frequency of drum drip maintenance can decrease if the system is shown to be dry.
How to Perform Drum Drip Maintenance
- Locate all drum drips throughout the property.
- If a quick opening device is installed, temporarily remove it from service.
- At the drum drip, ensure both valves on the drum drip are closed.
- To catch any water that may discharge from the drum drip, place a container underneath the bottom valve. For interior locations, remove the plug from the bottom valve. (Exterior locations may not have a plug.)
- Slowly open the top valve to full open position and maintain this position for 10 seconds.
- Close the top valve. **You should never open both the top and bottom valve at the same time as this may activate your system.**
- Slowly open the bottom valve to discharge any water. If you cannot see the discharge point, allow water to drain for 10 seconds.
- Close the bottom valve.
- If water discharged when you opened the bottom valve, repeat steps 5 through 8 until no water appears when you open the bottom valve. This will ensure you have removed all water from the system.
- When the system has been completely drained, meaning no water appears when the bottom valve is opened, close the bottom valve. Then slowly open the top valve and, if applicable, replace the plug. This will return the drum drip to service.
- If you removed a quick opening device from service before beginning drum drip maintenance, re-install it at this time.
If your drum drip discharges to a location you cannot see, you can use a second person to watch the drain and notify you when there is no more water draining from the system. Another option to identify when all water has been removed from the system is to place a bucket under the drain and empty the bucket after each discharge.
If you are discharging water without using a bucket to collect it, be sure the water will not cause a safety hazard in traffic areas, or damage any surrounding areas or equipment.
Need more help? Check out A1’s video on how to perform drum drip maintenance.
A1 is a leading expert on the latest technology in life safety. To find out more information or to ask a question, click here or call us at 1-800-859-6198.